Showing posts with label Lineside structures and scenery. Show all posts

Tuesday, 2 July 2024

Scalefour Crewe

The show in Crewe was an excellent experience. Very friendly and Tredethy Wharf received many compliments, it even gained one lady (with no connection to myself) voting it 'Best in Show'.

That said I've taken the decision to pack the layout away for a couple of years and concentrate on my Scalefour Jubilee Challenge layout,  Rospeath Lane. This is for a number of reasons;

  • Time: September 2026 will soon be here and due to getting Tredethy Wharf ready for Crewe I've lost about 5 days when I should have been working on Rospeath Lane.
  • Rusting Track: I need to solve the issue with the steel rail rusting on Tredethy Wharf. This winter I plan to install a dehumidifier along with some background heat in the log cabin. Next year I'll take a look at the track and if it is still showing signs of rust I'll have to make one of two decisions. To either scrape the layout and salvage what I can or replace the track with Hi-Nickle silver.
Depending on the above decision;
  • Scenery: On seeing a few photos taken at Crewe I'm starting to feel that some of the trees look a little naff and other parts of the layout are starting to look tired. I know I could now construct better trees and possible better scenery.
  • Backscreen: The back screen was a hasty replacement for the previous blank white background. It has always been my intention to add some subtle detail to the background but never plucked up the courage.
  • Cassettes: These have always been a problem. Some being very difficult to use. I'm going to   build a different style of cassette for Rospeath Lane and if they work better than Tredethy Wharf's will scrape the cuurent ones and change to the new style.
  • Locomotives: Before Tredethy Wharf's next outing I would at least need to complete the Beattie Well Tank. This has been on hold while I make a decision on converting the layout from DC to DCC. Rospeath Lane will be DCC which should help me to finally make that decision. I've also a GWR 13xx to build for the layout.
  • Rolling stock: I have a Brake Van Special to complete along with building a few clay hoods to go behind a blue Class 08.

So, as they say, a layout is never completed, but I really do now need to focus all my hobby time on Rospeath Lane.

Monday, 2 April 2018

Missenden has sown a seed

Since Missenden I've not had much time available for visits to the Man Cave. What time there has been has been put to installing Sprat & Winkle couplings on a few more wagons. With the Easter Weekend looming and the thought of having at least two full days of the four free for modelling I'd not been too worried. But how situations can change in a moment. During the week prior to Easter, we had a request from the Fostering team to take on an emergency placement. The little lost sole is with us for at least a week, possibly more...

On evenings away from home I've been putting some thought to tasks I would like to complete on Tredethy Wharf prior to Scaleforum. Thankfully it's not a long list. Apart from adding/improving rolling stock I feel I need to add a couple of trees, along with a couple more fiddle yard cassettes with some minor modifications to the existing cassettes. This would have been it if I'd not popped my head into Paul Bambrick's workshop on Back Screens at Missenden. I was very impressed by the work being created in the workshop and it sowed a small seed of discontent with my own work.

Standing back and taking a second look at the back screen on Tredethy Wharf made me realise it might now not be up to standard. It was created very quickly early in the layout's construction to enable me to present it at an exhibition in a reasonable "state of progress".

2013
No work has been done on the back screen since.

2018

After a little Googling on back screens I discovered that Paul Bambrick has written a book as well as a few magazine articles. Having duly purchased his book I found it to be a well written in a friendly encouraging style. This has made me seriously think about creating a new back screen for Tredethy Wharf and that I might be able to improve on the current one. The objective would be to add some depth to the scene.


So a new back screen for the layout has been added to the list as a possible "to do" before Scaleforum. It will be interesting to see what if I can make an improve on the current back screen. Just a shame I've not progressed the layout much over Easter.

Saturday, 18 February 2017

Farmer and wharfinger (maybe his wife?)

Being regularly away from home for work has stopped me progressing Tredethy Wharf as much as I would have liked. This has had a major effect in the preparation of the layout for next weekend's Lincoln show. I'm hoping that what I've been able to achieve will be enough to show the layout and the Scalefour Society in a good light.

Anyway this week I decided to take with me a couple of figures to paint while staying in a hotel for work. After my colleagues had departed during the day on Wednesday, I found myself being "Billy no mates" for an evening, so I broke open the paints and splashed a bit about on the figures. After a quick dry brushing last night and a coat of matt varnish I think they are ready to be installed on the layout...


Sunday, 27 November 2016

November update

With only 89 days left before the Lincoln Show I feel the scenery is now at a stage where I should move onto other things. I would like to do more with the scenery, especially as I've not planted any nettles yet and feel a couple of trees are required... but... I need to build, more clay wagons; more cassettes for the storage sidings; a few more open wagons as well as box vans. There is also some tidying up to do on the presentation information. So I've still plenty to do...


The above photos show the current state of play with the "test plank". The white streaks are the result of recent running sessions. They show where I've misjudged the height of the ground around the rails that caused the loco to stall or derail.

Onwards and upwards...

Wednesday, 19 October 2016

Just testing how things are looking

This evening, after adding a few bushes, weeds, and scenic bits at the cottage end of the layout, I thought I'd take a few pic's to see how it is starting to look when some rolling stock is added to the mix.


I'm not sure about the yellow flowers in the field, also I feel the grass texture in the field is looking a little flat but over it's begining to feel OK.

Monday, 17 October 2016

There's been heavy rain overnight

There was some heavy rain during the night but after a warm start to the day the early morning mist has cleared. Then with a blue sky and the sun beating down there are only a few puddles left...


Not sure if these capture the effect totally but, after reading an  article in one of the modelling magazines showing how to create puddles, I was dying to have a go at representing pools of water within the hard standing area. After all, Cornwall does get its fair share of rain and can get very misty and dank at times. I've spent a few Cornish holidays in a tent or caravan wearing rain coats or on the beach huddled under an umbrella. Sometimes being in the sea has been the driest place to be...

Still much to do on the scenery but hope to have the major items completed by the end of the month.


Wednesday, 21 September 2016

It's slowly coming together

The cottage and barn are almost finished but I've still to decide on the cottage garden. Is it to be a pretty cottage garden or more of a plain garden suitable for a working farm cottage?  At the moment I'm thinking more towards the latter.

I've also been trying to get the right finish for the hard standing around the wharf sidings. I've only seen one picture in colour of one wharf, the rest have been black and white. All pictures give the impression that the ground cover was compacted earth while the colour photo indicates a light brown colour. Getting an acceptable texture and colour has proved to be a bit tricky. After deciding on using Gordon Gravett's method for the road surface I thought I'd continue the theme and use his method for the ground cover.  I spent some time trialling different mixes of Humbrol Gloss paint, 40 (Pale Grey), 10 (Service Brown) & 6 (Tan) covered in Talcum Powder. Once I'd decided on a mix I had great difficulty in reproducing the trials on the layout. The results were awful, possibly due to the trials being on plasticard but on the layout I was applying the paint to DAS.  More trials continued using DAS as a base, but again when applied to the layout I was still not getting the correct finish. Hmmm... back to the drawing board...

So a change of tack was required, I thought about treating the hard standing like ballasting track. A little research on the web threw up Polak's ballast dust. I quickly purchased three different colours, with the view to mixing them together in different proportions to acheive the desired colour. Again, after I'd finally decided on what I thought was the correct colouring, when applying the mixture to the layout it looked different. It doesn't look too bad but not totally what I was aiming for, texture good colouring not quite right, a little too brown not enough grey I feel.


I think it is time to move on and come back to this once more scenic work has been completed. It will probably look different when all the grass, weeds, trees & bushes have been added.

Monday, 19 September 2016

How close can trees be to the track bed?

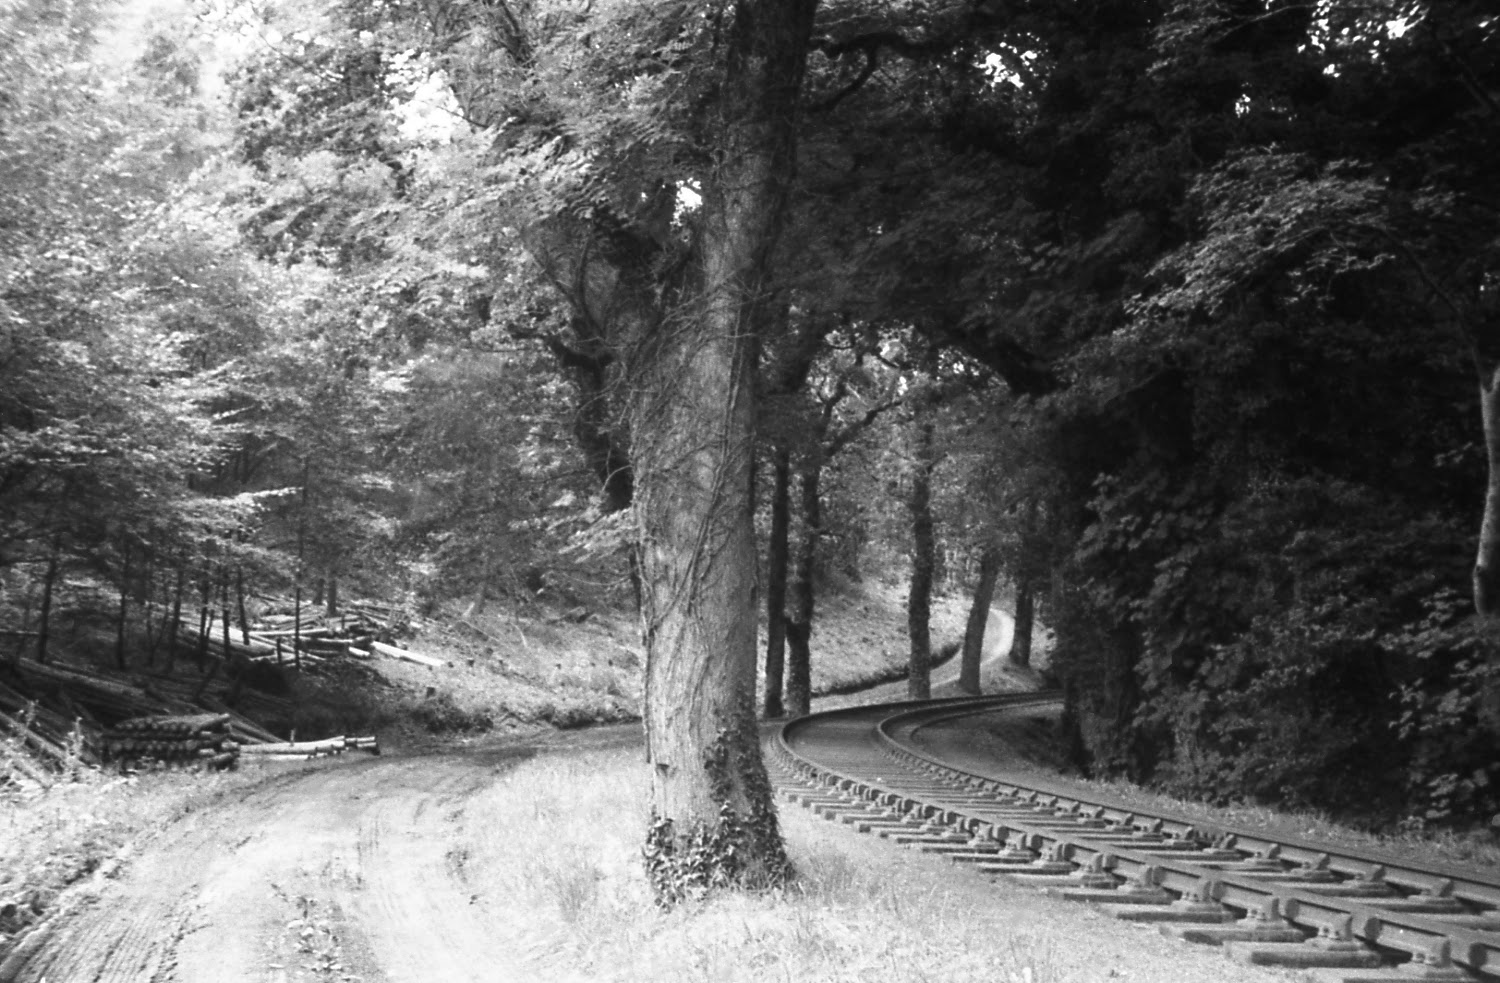
I've had more than one comment that the two skeleton trees seen in my previous post are too close to the track bed. I agree. In what might be deemed to be normal circumstances both trees are too close, but on this line there was more than one instance of trees being very close to the track bed. Maybe what makes the trees look closer than they will be when finished is they're not fixed, and one is leaning at jaunty angle towards the track.


I have a number of photos of this line and I am indebted to Chris Knowles-Thomas who took all the photographs below in July 1964.


The tree in the distance looks really close to the track bed.
I feel that the feature of trees being so close to the track bed helps to mark this line out to be a little different to most. From the start of building this "test plank" it has been my intenstion to somehow include some trees close to the track. The problem has been how many and where to place them on the layout without affecting the operation when using three link couplings....

Monday, 29 August 2016

Is DAS OK?

I managed to spend a few hours working on the layout this weekend and started by adding more DAS modelling clay for the base of the Cornish Hedges that border the Wharf sidings. This led onto thinking about how to represent the lane that crosses the track and I then plucked up courage to start laying down the hard standing around the Wharf sidings again using DAS.

After trialling a couple of solutions I've decided to follow Gordon Gravett's technique for the lane. This is using plasticard for the base, painted with gloss enamel paint followed by a sprinkling of Talcum Powder.

 So far I've only installed the plasticard base and may run a few more tests to find the best combination of paint colour and amount of Talcum Powder to use.

I've also spent a little time mulling over the position of two large trees. One feature of this line is that there are a number of large trees that were allowed to grow very close to the track. I want to add this feature to the layout. The problem I face is positioning the trees without them getting in the way of uncoupling wagons when using three link couplings. The two skeleton trees in the photo have been temporarlity positioned in what I think is the best position. I'll make the final decision after a few running sessions and once I've added more scenic detail.

There's still much to do to get the picture right but I feel like I've made some good progress.

Saturday, 13 August 2016

Progress on the Barn

I've been using the following photograph as a colour guide for the stone work on the barn. It was taken a few years ago when I was in Cornwall and shows the wall opposite the cottage next to the old track bed at Helland Bridge.


My interpretation below...


After my attempts at representing weathered wood on wagons, I felt I could attempt the barn doors. A different combination of colours was used than those applied to the wagons. This time I started off with a light grey base coat then built up the colours by dry brushing dark grey, followed by Lifecolor's Dark Shade and a few strokes of Bestial Brown.

There is still the roof to get to grips with, along with a little more weathering and tidying up of the rendered walls. I'd also like to add some moss to the roof but at the moment not sure how best to do this?


Monday, 1 August 2016

The clock is ticking

Only 208 modelling evenings before the Lincoln Show. This should be plenty but I'm starting to panic a little.

At the beginning of June I started with the best intention to really crack on with Tredethy. Unfortunately it's not turned out that way, a new pastime has grabbed my attention more than I expected. I'm now planning my days differently in the hope that I can claw back some lost time.

So during Sunday and early this morning I put in a few hours in the "Man Cave". I've solved a few issues with the track where there had been some random derailments as well as continuing the construction of the farm cottage and barn.


I think somewhere in a previous post I'd explained that for many years, after a failed attempt at scratch building Bodmin General's Weighbridge Office, I've been carrying a mental block about constructing buildings. So to get me started on the two I need for Tredethy, I chose two Wills kits. I'm building the cottage as a mirror image to the instructions that comes with the kit. This should enable it to fit well in its location on the layout. As for the barn, out of the box, its style is not very Cornish. When standing back and having a re-think I thought I could make a few minor alterations to suit its location on the layout. I moved the small door from the back to the side of the barn, along with replacing the timber walls with render and making the barn taller. I'm hopeful that his should bring it closer to what might be seen in Cornwall

Apart from the above, I'm only at the very early stages of constructing another rake of 8 clay wagons.

There is still much to do and the pressure is mounting...

Saturday, 20 April 2013

Foliage support structures

I'm about to set off for a weekend at Scalefour North, but have just enough time for a very quick update on Tredethy Wharf.


The left hand scenic break is progressing reasonably well, I've one more structure to make to complete the group before I lay on the foliage. Hopefully they will knit together to give the impression of how sections of the Wenford Bridge branch looked, with trees over-hanging the track creating tunnels of foliage.

Thursday, 28 March 2013

Braving the cold

Today I braved the cold garage and spent most of my time working on the fiddle yard boards. I wanted to create a screen to mask the fiddle yards but, as my initial intention is to operate this layout from the front, still give me access without having to walk around to the back of the layout. My solution has been to mask off the first 12 inches and have a low front for the remaining 2' 6". I'm hoping this will help to focus the view onto the scenic boards and away from the other 50% of the layout. The other problem I've solved today is how and where to hang the control panel at the front of the layout. All things that probably should have been thought of at the initial planning stages of the layout....

At the end of the day I fetched the two scenic boards out of the house and erected the layout to see if it all looked OK.


I'm starting to feel a little happier with the layouts presentation for its first exhibition. There is still a lot to do but thankfully it has been advertised as a work in progress. I'd better get back to making trees this evening...

Tuesday, 26 March 2013

Flocking fun

I am starting to have some fun creating trees, bushes and ground cover.

At the weekend I'd quickly painted a back screen. Though it's a little rough, for the moment I think it does the trick. By now I was hoping to have had the layout erected in the garage so that it could be worked on as a whole. With the cold weather continuing this is not really feasible. So the task of a back screen was brought forward to reduce the damage to any scenic items while moving the boards around. Also, as the major design fault of this layout is that I've incorporated the end back screens on the fiddle yards boards, I'm giving thoughts about adding removable ends to each scenic board as protection when transporting it around the house or to an exhibition.

Start of the Cornish Hedge and fencing
I've started to install fencing along with different lengths and colours of static grass to the meadow at the back. At the front it is hoped that the long white sausage will eventually look like a Cornish hedge. The idea is that this hedge will run all along the front, but for the moment the jury is still out on this idea.

Test tree finished
Above is my first tree for many a year, in fact only my third attempt ever. My first couple of trees where constructed about 25 years ago on a long lost OO layout and can just be seen here. I think the above is a slight improvement. Not sure where it will be installed on the layout as it was only constructed as a test piece so it might not pass muster.

All authorised by the management
My missis is being a little treasure at the moment not only is she allowing me to work in the kitchen she's also allowing me to take over the dinning table for a few evenings. Mind you she has a big distraction on at the moment which I'll mention in my next post.

Saturday, 9 March 2013

Buffer stop (part 4)

Thought I'd better attempt the buffer stop before starting on the ground cover around the siding and loop. Previous posts in this series are, Part 2 which explains my choice, and  Part 3 which has photographs of a buffer stop currently at Boscarne Junction. Below is another photograph of the buffer stop at Boscarne Junction which has helped in the construction of my model.

Boscarne Junction

I've been lucky in being lent a jig for bending rail by Clive from the local Area Group. So with Clive's rail bending jig to hand, I set about  bending lengths of rail to different angles to try and acheive the correct profile.

Think I've got the correcte angles?

Once I'd formed a bend that looked correct I soldered four rails together. Then after annealing the rail I made my first attempt to create the four 'S bent' rails in one go so that they would all be the same. In the first attempt I failed at getting the second 'return' bend the correct distance from the first, but lesson learned and the second attempt with fresh rails worked out just about right. The only problem was one rail did not follow the same profile as the other three. Looking at the one at Boscarne there does seem to be a little deformity in some of the rails forming the buffer stop. So I took the view that a little difference in the rail profiles could be put down to 'wear and tear'.

All rails bent ready to construct the buffer stop

Next, using another jig made by Clive, I create the joggle for the two uprights. This was quickly followed by creating a vertical right angled bend in the two running rails. I've resorted to using nickel silver rail for the running rail as all my attempts at bending steel rail through 90 degrees, annealed or not, ended up with broken or twisted rail. Nickel Silver rail seems to be a little more pliable.


Nearly finished

The buffer stop at Dunmere and those at Wenfordbridge all had wooden buffer beams so I've created one from 2mm ply, but I'm not sure if this is the correct thickness. I might add a thicker buffer beam later. I've got to admit that this has not been a very scientific approach. I didn't take any measurements of the buffer stop at Boscarne so I've cribbed approximate dimensions off a Mike's Models GW/LSWR buffer stop. For other dimensions I've applied the rule of thumb. Not very P4 I know, but I'm hoping that as long as it looks right it will be OK

Buffer stop installed on layout

There are a few cosmetic bits to apply, such as the bolt heads on the running and buffer rails, before painting/weathering. I'll then set about bedding it in with ballast, hardstanding, other ground cover, grass and weeds. Time will tell, but it might soon start to look the part...

Saturday, 2 March 2013

Enthusiasum rekindled

It's been a while...

For the last couple of months, I've got to admit that, I'd lost my mojo for Tredethy Wharf.... Instead I've been spending my time on some wargaming projects. Very easy modelling, getting a few more models ready for the wargaming table. Normally these dual interests trot alongside each other quite nicely and over the Christmas break I'd planned on committing a couple of days fully to Tredethy Wharf. Unfortunately due to both me and my wife being ill, which meant cancelling all our Christmas plans and New Year celebrations, somehow knocked me sideways and I lost my enthusiasum for Tredethy. Luckily my enthusiasm for Tredethy Wharf fas been rekindled after helping Bob with his Winterschef layout at the recent Milton Keynes show.

Since the the show I've added the first coat of static grass to the second board, then after not being happy with the roughness of the result on the first board, I've attacked ridges and undulations with a hammer. This has left numerous huge rabbit warrens....hopefully these will vanish with further applications of static grass. Mind you, it might be worth trying to incorporate a rabitt warren and/or a few mole hills into the scene somewhere.


The rails on one board have been painted in, what I think, is a dusty rust colour and I've also started ballasting the track on the same board. I'm using Carrs Ash Ballast fixed in place with a diluted solution of Copydex. After looking at photos of the branch, the ballast might be a little on the coarse side, but this ballast should help to differentiate between the hardstanding mud/soil area around the sidings and the ballasted track.

I must get to grips with the buffer stop soon before working out how to represent the hardstanding areas, after which it will be onto fencing, hedges and trees... The current plan I'm working towards is to have the left hand end more complete than the right for the exhibition in May.

Sunday, 2 December 2012

Creating the earth

After applying a mixture of Artex and sand over the Mod-Roc, then sploshing a thin coat of raw umber over the covering the layout looks a little like a badly iced cake.


I'm hoping that the rough surface will give some extra lift to the static grass helping to represent tufts and undulations that can be seen in fields.


After applying the first coating of grass, I'm not sure the result is what I'm after. I think I might have over-done the rough suface. I'll stick with the idea for now, apply a few different textures and colours of grass to bring the ground alive a little. If it's not what I'm after it can be changed...


Wednesday, 10 October 2012

Scenic test

I've been mulling over how to represent the ground cover on Tredethy Wharf. One member of the local group has been recommending teddy bear fur, dyed and then cut to shape and length. While it can give good results I have been using static grass for for my war-gaming bases for many years and wondered how I might use this material in larger areas.

Above is a 15mm (1:100) British Napoleonic command stand that uses static grass. I use a substance called Basetex as ground cover on my wargaming bases, dribbled with some brown ballast to give added texture. A wash of Raw Umber is roughly applied and the brown ballast highlighted by dry brushing, after which the static grass is applied. This procedure was the starting point of my thoughts about how I could use these techniques on Tredethy Wharf.

In my opinion field grass is not uniform length nor is the ground flat on which it grows. Thoughts about applying a layer of 2mm static grass onto a flat surface would only achieve a uniform covering so this made me decide to construct a test block to do some trials.


A block was created using offcuts of Styrene which was then covered with Mod-Roc.  I then applied a thin layer of Basetex to one section but when dry it cracked and was easily chipped. Hmmm... Next thought was to use Artex plaster with a little PVA and some sand added for texture. I mixed three different batches of plaster, each with a different ratio of builders sand. These mixtures were then applied in three bands separated by a band of uncovered ModRoc and stippled to give a rough ground cover. A wash of Raw Umber was then applied and allowed to dry.


I applied 2mm and 4mm lengths of static grass along with a small section of flock on the uncoated ModRoc as a control to help me appreciate the difference between the types of ground cover. Then, in an attempt to represent tufts and different grasses, I applied different lengths of static grass (2mm, 4mm and 6mm) onto previous coverings.


The above photograph does not show the result very well but I think I'm starting to achieve the result I'm after. Although, I'll probably have a little more practice before starting on the layout.

Saturday, 8 September 2012

A month on.

Well it's been a little more than a month since my last post and even though I've not been idle there does not seem to be much to show for my efforts.


During the last month I've built the base of the second fiddle yard baseboard; added the entry track and docking station for the storage cassettes on both fiddle yards; constructed a few storage cassettes; sculptured the styrene block to nearly all of the scenic area; covered all styrene on one board with Modroc; and thrown together a barn kit by Wills.


Not sure if the barn will end up permanently on the model as I don't think it is typically Cornish but as a temporary building it will help with a scenic break at that end of the model. I'll also make use of a Wills Farm Cottage kit for the cottage but I'll build it as a mirror image.

Quite a bit more time has been spent on further track testing, then doing a few minor tweaks here and there to improve running. Although while struggling with one particular annoying derailment, along with the fact that I'm struggling with my first chassis, I was nearly at the stage of deciding P4 is not for me. I could not work out why one wagon would come off and others stay on through a particular piece of track, then the next evening the problematic wagon would be OK. It was really trying my patience. Then a visit by local Scalefour group members and the encouragement they offered, plus a few more evenings of frustration, I think, I have finally solved the derailment problem.

A little more progress has been made with the clay wagons but not enough to show in this post. I've also started a test piece for trialling how to build up the ground work and apply grass, more of which later. So it would seem I've been busy though it does not feel like I have made much progress as I was hoping to have had the lighting pelmet constructed by now and to have started on the ground work on the model...

This project is certainly a huge learning process and is increasing my appreciation of all the skills that have gone into creating the excellent P4 layouts that are on the exhibition circuit. I will no doubt have many more trying/frustrating episodes... It would seem it's all part of the fun!

Tuesday, 5 June 2012

Scenic start

Since the last post on Tredethy I've progressed the layout a little further. A recent visit by Gordon, when he brought along a couple of his locos and a few wagons, did show up a few little issues with running. One point's switch blades were still not closing with the stock rail in one direction. This was soon solved by replacing the spring wire that was supplied with the Tortoise motor with 0.9mmm spring wire from Gordon's own stock. Another point was being temperamental and though most wagons ran through it there were still the occasional derailment...The thought was that upgrading the spring wire might help on this point. The main issue that presented itself was a loose wire in the plug between the layout and the control panel, even though the last time I applied power to the layout it all worked fine. At the start of the evening this loose wire caused a short that was affecting point operation and the fault took a good hour to track down and solve. This has shown me the problems that can happen with a sectional layout that is constantly being moved and knocked. Since Gordon's visit I've purchase some 0.9mm wire and upgraded the two remaining points and they both now seem to work more consistently with, so far, no derailments


With the track fully commissioned I've tidied the wiring on both boards and retested the layout. Though this is a very simple layout with minimal wiring this was still a task that took a couple of evenings.


Then, after spending a couple of weeks on my wargaming projects, and a couple of days away at Stratford upon Avon trying to educate myself  with a bit of Shakespeare (probably too late in the day...), I've started to have another look at Tredethy. What is the next stage, ballasting the track, painting rails and chairs, or putting in the scenic sub base? I'm itching to get on with the scenic side of this test plank, so spent a few hours over this bank holiday building up the sub base on one of the baseboards with blocks of polystyrene .


There is still a bit to do on this first board before starting on the second. My intention is to sculpt the the polystyrene into the approximate desired contours before covering with a couple of layers of ModRoc. Once the ModRoc is applied I'll paint the rail and chairs then ballasting the track before making a start on the ground cover on the two boards. Not sure if this is the recommend order of things but it seems right to me.